ROAD

Endurance

E12
D13

Super-Light-Rennrad

SL12

MOUNTAIN

Vollgefedertes MTB

F12

Hardtail-MTB

H13

GRAVEL

Schotterrad

G13

Bike-Tailoring

Kontakt

GRAVEL Fitting System


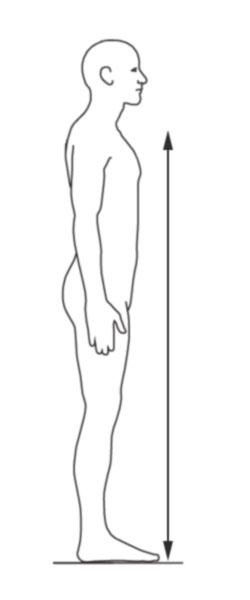
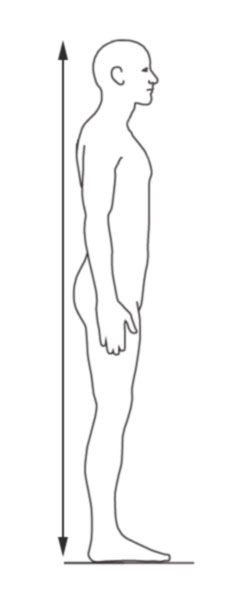
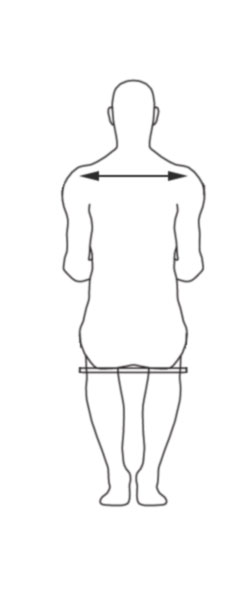
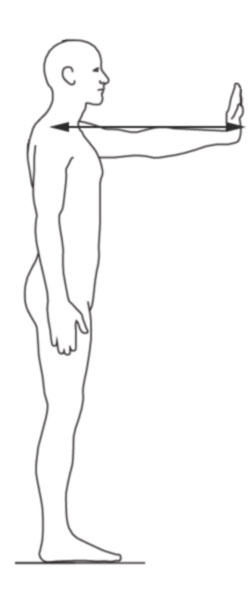
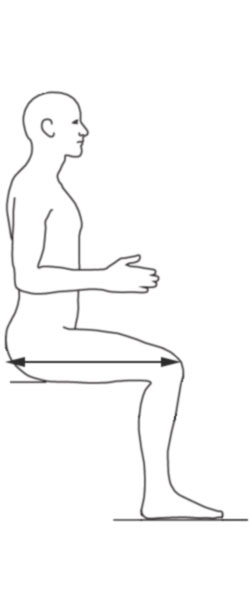
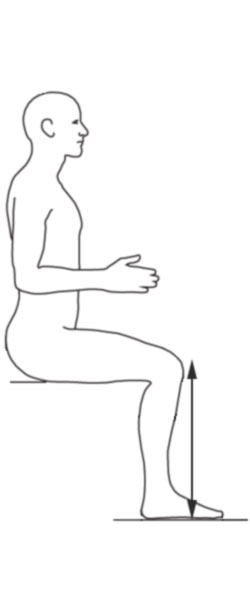
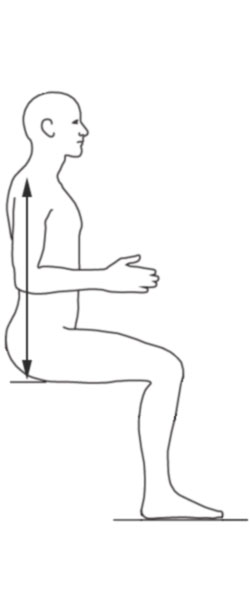
Bitte befolge die in diesem Formular enthaltenen Hinweise zur Vermessung. Die Angaben in diesem Formular sind erforderlich, um möglichst genaue Ergebnisse zu erzielen. Wenn du Probleme oder Fragen zu diesem Formular hast, kontaktiere uns und du erhältst zusätzliche Unterstützung.

Wenn du unseren Bike-Tailors lieber ein handschriftlich befüllbares Dokument vorlegen möchtest, folge bitte diesem link.
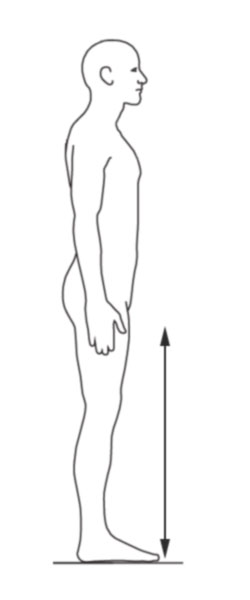
Kundeninformation
Kundendetails
Deine gewünschten Spezifikationen

Schrittmaß und Körpergröße

Bitte mache die folgenden Abmessungen im Stehen in deiner Fahrradkleidung und barfuß mit dem Rücken an einer geraden Wand. Stelle dazu deine Füße mit ca. 20 cm Abstand nebeneinander. Erfasse deine Messwerte im BIKE Fitting Sheet.


Halte eine Wasserwaage zwischen deine Beine und ziehe sie nach oben. Versuche dabei den gleichen Druck auf deinen Schritt auszuüben, den du spürst, wenn du auf deinem Sattel sitzt. Nimm die Messung vor, wenn die Wasserwaage im Lot ist. Miss dazu von der Oberkante der Wasserwaage bis zum Boden.

Suche die Sternumkerbe an deinem Hals - das ist die Stelle, an der deine beiden Schlüsselbeine aufeinandertreffen. Ziele einige Zentimeter unterhalb des Kehlkopfes auf die Stelle, an der die Oberseite deiner Brust beginnt. Miss den Abstand von der Oberkante der Kerbe bis zum Boden.

Stell dich mit dem Rücken an die Wand, suche mit einer Wasserwaage den höchsten Punkt auf deinem Kopf und richte sie waagerecht aus. Achte darauf, dass die Wasserwaage auch die Wand berührt. Miss nun von der Unterseite der Wasserwaage bis zum Boden.

Schulter-, Ober- und Unterarm

Benutze eine Wasserwaage für die folgenden Messungen. Die Messungen sind im Stehen und im Sitzen vorzunehmen.


Stehe aufrecht und frei von der Wand und entspanne deine Arme an den Seiten. Lass eine andere Person den Abstand zwischen deinem linken und rechten Schultereckgelenk (oder AC-Gelenk) messen. Das AC-Gelenk befindet sich am Ende der Schlüsselbeine (in der entgegengesetzten Richtung der Sternumkerbe) und ist am einfachsten auf den Oberseiten der Schultern zu finden.

Halte im Sitzen auf einer flachen Bank mit einer Wand als Rückenlehne die Wasserwaage in der Hand und mache eine Faust. Senke deinen Arm, so dass er sich an deiner Seite befindet. Beuge den Ellbogen um 90 Grad und strecke den Unterarm vor dir aus. Halte die Wasserwaage senkrecht zu deinem Unterarm und miss vom äußersten Knöchel deiner Faust bis zum Knochenvorsprung am Ellenbogengelenk.

Stehe aufrecht mit dem Rücken zur Wand und der Wasserwaage in der Hand und mache eine Faust. Während deine Schulterblätter an der Wand anliegen, hebe den Arm an und strecke ihn waagerecht vor dir aus. Die Arm sollte parallel zum Boden sein. Die Wasserwaage sollte senkrecht zu deinem Arm sein. Miss nun vom äußersten Fingerknöchel bis zum AC-Gelenk in der Schulter. Miss beide Arme nacheinander und bilde den Durchschnitt.

Rumpf-, Ober- und Unterschenkel

Diese Messungen werden im Sitzen durchgeführt (auf einer flachen Bank mit einer Wand als Rückenlehne). Dein Rücken muss gerade sein, deine Schulterblätter und dein Becken müssen fest gegen die Wand gedrückt werden. Deine Oberschenkel müssen parallel zum Boden verlaufen, und deine Knie sind abgewinkelt mit 90-Grad-Winkel. Verwende eine Wasserwaage, um folgende Messungen vorzunehmen


Lege die Wasserwaage auf die Vorderseite deiner beiden Kniescheiben. Miss von der Innenseite (der Teil der Wasserwaage, der Ihre Knie berührt) bis zur Wand. Miss auf beiden Seiten und bilde den Mittelwert der Messungen.

Lege die Wasserwaage über die Oberkante deiner Kniescheiben, wo sie mit der Unterseite deiner inneren Quadrizepsmuskeln verbunden sind. Miss von der Unterseite der Wasserwaage bis zum Boden.

Lokalisiere dein Akromioclaviculargelenk (oder AC-Gelenk – siehe Messung der Schulterbreite). Lege die Wasserwaage von der Oberseite des AC-Gelenkes bis zur Wand und achte darauf, dass die Wasserwaage waagerecht liegt. Miss nun von der Unterseite der Wasserwaage bis zur Oberseite der Bank. Wiederhole diesen Vorgang für die linke und rechte Seite und bilde den Durchschnitt der Messungen.

Übertragung deiner Daten

Sobald deine Daten übermittelt sind, macht sich unser Team an die Arbeit, um dein Traum-Bike zu entwerfen.

Die Daten, die du uns über die Formulare auf unserer Website übermittelst, werden nicht an Dritte weitergegeben, es sei denn, dies ist datenschutzrechtlich zulässig. Für weitere Informationen besuche bitte unsere Privacy Statement

BIKE Fitting System

Welcome to CS | Cycling-Sport's BIKE Fitting System

This system is the starting point for your custom ride.

This process should take about 15 minutes to complete. Be sure you have your Bike Fitting sheet ready to note your measurements.

You will need to provide these items to complete the BIKE Fitting Sheet:

- WaterLevel
- Tape Measure
- Flat Surface (for Sitting)
- A Marker & Pen

To get the most accurate results, we suggest having a partner with you to aid in the measurements.

Introduction

Please fill out the "Client Info" Section

If there is information missing our team will not complete the fitting system report.

Requested Bike Type
Refers to the bike that you are interested in acquiring
Conponent Brand
Refers to the components you would like fitted to your bike
Rim/Tire Notes & Color and Paint
Please note what you are interested in

Inseam & Height

Instructions
Wear your cycling shorts, and take the following measurements in bare feet. All measurements should be taken while standing against a straight wall. Set your feet approximately 8" apart. Record all of your results in the BIKE Fitting Sheet.

Inseam Measurements
Snug up a level in your groin and aim for the same amount of pressure on your crotch as you feel when sitting on your bike seat. Take your measurement when the level is plumb. Measure from the top of the level to the floor in front of you.

Sternal Notch Measurement
Find the sternal notch in your neck; this is the location where your two collar bones meet. Aim for a few cm below the lump in your throat and where the top of your chest begins. Measure the distance from the top of the notch to the floor.

Total Height
Standing with your back on the wall, use the level to find the highest point on your head and adjust till plumb. Make sure that the level is touching the wall as well. Now measure from the bottom of the level to the floor.

Shoulder, Upper and Lower Arm

Instruction:
Use your level to hold while you take the following measurements. You will stand and sit for the next measurements.

Shoulder Width
Standing tall, free from the wall, relax your arms at your sides. Have someone measure the distance between your left and right acromioclavicular joint (or AC joint). The AC Joint is located at the end of your clavicles (the opposite direction of the sternal notch), and is easiest to find on the tops of the shoulders.

Forearm Length
From the sitting position (this must be conducted on a flat bench using a wall as a backrest), Hold the level in your hand, making a fist. Lower your arm so that it is to your side. Bend your elbow to 90 degrees extending your forearm ahead of you. Keep the object in your hand perpendicular to your forearm, and measure from the furthest knuckle to the boney protrusion at your elbow pivot.

Arm Length
Standing tall with your back against the wall and the level in your hand, make a fist. While your shoulder blades are resting against the wall, raise your arm at the shoulder, extending your forearm ahead of you. Your arm should be parallel to the ground. The level should be perpendicular to your arm. Measure from the furthest knuckle to the AC Joint in the shoulder. Measure both arms and take the average.

Arm

Torso, Upper and Lower Leg

Instructions:
These measurements will be from the seated position (this must be conducted on a flat bench using a wall as a backrest). Your back must be straight with your shoulder blades and pelvis pushed hard against the wall. Your femur (thigh) must be parallel to the ground, and your knees are at a 90-degree angle. Use a level to take the following measurements.

Thigh Length
Place the level across the front of both of your kneecaps. Measure from the inside (the part of the level touching your knees) to the wall. Measure from sides and average the measurements.

Lower Leg Length
Place the level across the top edge of your kneecaps where they connect to the bottom of your inner quadriceps muscles. Measure from the bottom of the level to the ground.

Torso Length
Locate your Acromioclavicular joint (or the AC Joint). Place the level from the top of your AC to the wall ensuring the level is plumb. Measure from the bottom of the level to the top of the bench. Repeat this for both left and right sides and average the measurements.

Submit your Results

You have now completed the measurement form.

Please scan or take a picture of your document and send it to us at:

eMail Now

Additional Information
If you need any help or additional information, please contact us at +49000000000000